LemonRx DSMP 6 kan. Mottagare No Pin DSMX/DSM2
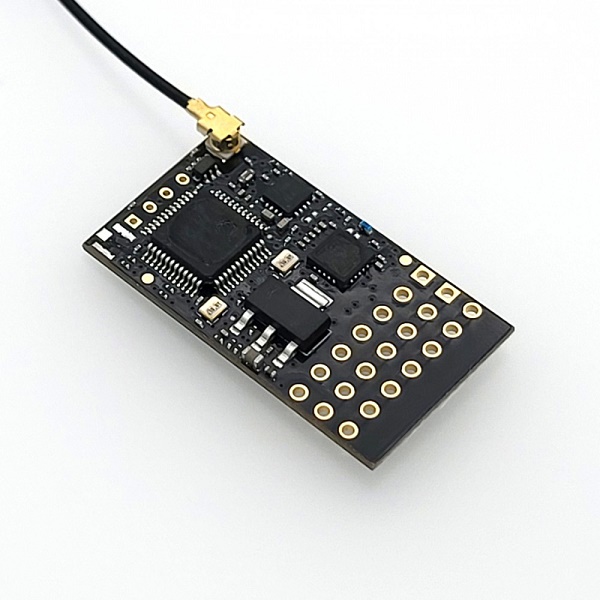
Spektrumkompatibel mottagare.
Product Specification
Dimension and Weight:
17.4mm(W) x 31.5mm(L), 2.3 grams including extened antenna
Recommended voltage range:
3.5V to 8.5V (2S LiPo capable)
Technology:
DSMP with GEN2 SDR stack (DSMX / DSM2 compatibility)
Highlight
DSMP 6-channel receiver is DSMX/DSM2 compatible that provides exceptional performance.
Quick Reference Guide
Failsafe:
Bind receiver and current channel values will be saved. Failsafe will be activated when no signal is received for 2 seconds. All channels will be positioned to failsafe default. For this reason, it is recommended that the throttle should be at 0% while all other sticks are centred during binding.
1S LiPo Application
The minimum recommended safe supply voltage is 3.5V
NOTE:
The battery must be capable of maintaining that voltage while delivering the required maximum load current to the receiver and servos.
In some cases you MAY be able to operate at a lower voltage (for example a well discharged 1S LiPo cell) but you must test it in practice to be sure.
|
|
|
|
|
LemonRx DSMP 10-Kan Stabilizer/XT60 Energy Meter DSMX/DSM2
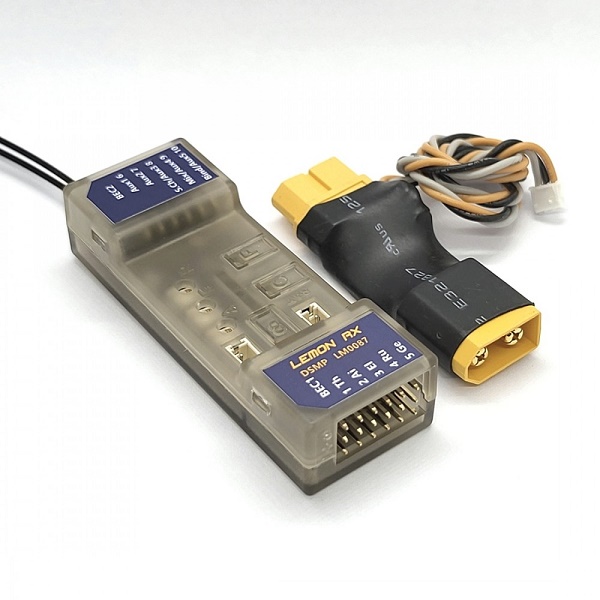
Spektrumkompatibel mottagare med stabilisering och telemetri.
Product Specifications:
Weight and Dimension:
16.3 grams, 66mm x 15mm x 24mm
Recommended voltage range:
3.9V to 8.5V (2S LiPo capable)
Telemetry Option:
Integrated with Barometer with Vario, Altimeter, Energy meter (Requires V/I sensor) and Internal Temperature Sensor
Technology:
DSMP with GEN2 SDR stack (DSMX™ / DSM2™ compatibility)
Fungerar även med Spektrum NX serien.
Highlight
The generation 2 DSMP 7-channel telemetry stabilizer is a complete redesign from GEN1 that provides the ultimate reliability, features and performance. The latest GEN2 telemetry stabilizer featuring setup menu on the Spekrum™ or Radiomaster TX16s radio screen, making the stabilizer configuration easier than ever.
- Setup menu on Spekrum™ or Radiomaster TX16s radio screen for various settings without the need of using buttons
- Choices of voltage and current sensors with exceptional capability
- XT60 / T-Plug: 5S LiPo (21V max), 60A max.
- Voltage Probe: 45V max.
- DSMX™ / DSM2™ compatible, 10-channel full-range telemetry stabilizer with full telemetry features including a built-in barometer with vario, altimeter, energy meter (Current, Voltage, mAh), and internal temperature sensor
- High sensitivity gyro with proprietary stabilization algorithm ensures responsive airplane control for both electric and gasoline engine application
- BEC1 and BEC2 dual inputs allow high-reliability operation while improving setup for high current drain performance servo
- Built-in Detla, V-tail and Normal Wing mixer
- Supports stabilization with separated channel dual aileron operation
- Stabilization always-on feature allows nine usable channels on a 10-channel receiver
- Real-time variable stabilization gain control on channel 8
- All-channel failsafe
- Firmware health monitoring software stack and ultra-low operational voltage (3.6V) ensures high operation reliability
- Generation 2 SDR stack ensures the fastest channel searching and advanced algorithm for signal recovery with ultra-low-latency experience
- Antenna diversity improves the reliability of the wireless link
- Satellite port for additional signal diversity
- Gyro stabilization activation with either AUX2 or Gear channel
- 3 potentiometers for individual gain tuning
User manual
- See www.lemon-rx.com/manual
Quick Reference Guide
Accessing the Setup Menu on the Radio Screen
This feature is available with the newer vesion of GEN2 telemetry receiver only, which can be identified with the new simplified label design. The setup menu can be accessed on the radio screen with a telemetry receiver bound to a Spekrum™ or Radiomaster TX16s radio within the first 60 seconds after power-on by moving the two sticks to their minimum positions on all four channels.
- Power on the receiver and ensure that telemetry information is displayed. Select a telemetry page that shows "Lemon Rx" telemetry information on the radio. For RadioMaster TX16s, see YouTube video "https://www.youtube.com/watch?v=aOL_Iddin1k")
- Ensure that the first four channels can reach very close to +/- 100% (sometimes, with fine-tuning, this can be an issue).
- Within the first 60 seconds after the receiver is powered on, move both the left and right sticks to the lower right and lower left positions.
- Observe the radio telemetry screen and wait for "Lm Rx Config" to appear, which takes about 2 seconds. Release the sticks at this point.
- Use the left/right stick to change the menu. Use the up/down stick to make selections or changes.
*Users can take as much time as needed to change or review settings at this point. Note that changes are only saved if "Exit & Save" is selected at the end of the operation.
Bind with bind plug
- Insert bind plug on Channel 10
- Connect power
Bind without bind plug
- Connect power
- Hold the B button until the red LED flashes
Bind with a satellite without a bind plug
- Connect power
- Hold the B button until the red LED flashes
- Disconnect power
- Plug the satellite wire connector into the stabilizer
- Connect power
Failsafe
- Connect power to the receiver and ensure the servos are working with the transmitter
- Press the F button for 3 seconds until green changes from off to on and vice versa to change the failsafe setting. Channel value is saved as failsafe default at the time the green LED turns on.
- Turn off the transmitter and wait 2 seconds to ensure the failsafe is activated accordingly by ensuring there is torque generated with finger-pushing the servo linkage if it was to be set. Vice versa.
Stabilization activation switch
- Disconnect power
- Unplug all servos connection except BEC/ESC
- Insert bind plug to channel 8
- Hold the C button
- Connect power. Wait for about 1 second until the 6 LEDs flash.
- Release the C button
- Press C to make changes within 3 seconds. Green = CH7, Blue = CH5.
- Wait for 3 seconds and remove the bind plug
Wing Mode and Dual Aileron
- Disconnect power
- Unplug all servos connection except BEC/ESC
- Insert bind plug to channel 9
- Hold the C button
- Connect power. Wait for about 1 second until the 6 LEDs flash
- Check the receiver label/user manual to understand the referred LEDs' operation
- Release the C button
- Observe which red LED is flashing and brief press C to select the required mode
- Press C to toggle between settings. On means selected. Exit automatically in 5 seconds.
- Wait for 3 seconds and remove the bind plug
- Ensure transmitter mixing is set accordingly for dual aileron if stabilized dual aileron is to be configured.
Gyro direction
- Check the receiver label/user manual to understand the referred LEDs' operation
- Connect power and wait 1 second
- Hold the C button and wait for about 1 second until the 6 LEDs flash
- Release the C button
- Observe which red LED is flashing and brief press C to select the required mode
- Press C to toggle between settings. On means selected. Exit automatically in 5 seconds.
- Wait for 3 seconds and remove the bind plug.
V/I sensor calibration
- Turn on the receiver and transmitter. The telemetry report page may optionally be checked during and after calibration.
- Plug the V/I sensor. Make sure the required DC loading device such as a brushless motor with ESC as well as the current and voltage meter is connected.
- Press the F and B buttons together at the same time for 2 seconds but no greater than 5 seconds
- Observe 3 green LED flashes. Ensure 8.4V is provided to the V/I sensor.
- Press F or C button briefly
- Observe 3 red LED flashes
- Turn on the DC loading device by throttling the transmitter. Ensure 4A is drawing across the V/I sensor. Be careful with the motor spinning if it is to be used.
- Press the B button to save and exit.
Voltage Probe calibration
- Turn on the receiver and transmitter. The telemetry report page may optionally be checked during and after calibration.
- Plug the voltage probe into the receiver.
- Press the F and B buttons together at the same time for 2 seconds but no greater than 5 seconds
- Observe 3 green LED flashes. Ensure 8.4V is provided to the voltage probe sensor. A fully charged 2S LiPo is very close to 8.4V and may be used.
- Press F or C button briefly
- Observe 3 red LED flashes
- Press the B button to save and exit.
Throttle Lock (TL)
Throttle lock is a feature that is only preferred on electric aircraft and maybe disabled for petrol engine / other application. Factory default will enable this feature.
- Power off the receiver
- Unplug all servos connection except BEC/ESC
- Insert bind plug to Channel 7 (AUX2)
- Hold C button (do not release your hand even after power on)
- Power on the receiver (while C button is still being hold)
- Wait (~2sec) and observe until the 6 LEDs are flashing (while C button remains pressed at all time)
- Release the C button when the 6 LEDs are flashing.
- Brief press C to change setting. Three red LEDs means TL disabled or three green LEDs means TL is enabled. User only has 2 seconds to change or receiver will exit TL setting.
Gain setting
- Adjust via the 3 dials or real-time master gain on channel 8 depending on the transmitter channel's availability.
View setting LEDs with all on
- Press the C button briefly (no more than 2 seconds).
|
|
|
|
|
LemonRx DSMP 7-kan Telemetri Vario/höjd/energi mm XT60 GEN2
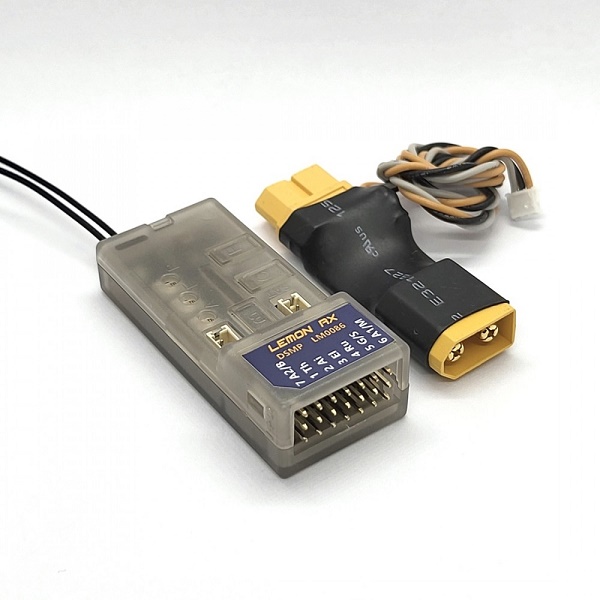
Spektrumkompatibel mottagare med stabilisering och telemetri.
Product Specifications
Weight and Dimension:
13.1 grams, 55mm x 15mm x 23mm
Recommended voltage range:
3.9V to 8.5V (2S LiPo capable)
Telemetry Option:
Integrated with Barometer with Vario, Altimeter, Energy meter and Internal Temperature Sensor
Technology:
DSMP with GEN2 SDR stack (DSMX™ / DSM2™ compatibility)
Fungerar även med Spektrum NX serien.
Highlight
The generation 2 DSMP 7-channel telemetry stabilizer is a complete redesign from GEN1 that provides the ultimate reliability, features and performance. The latest GEN2 telemetry stabilizer featuring setup menu on the Spekrum™ or Radiomaster TX16s radio screen, making the stabilizer configuration easier than ever.
- Setup menu on Spekrum™ or Radiomaster TX16s radio screen for various settings without the need of using buttons
- Choices of voltage and current sensors with exceptional capability
- XT60 / T-Plug: 5S LiPo (21V max), 60A max.
- Voltage Probe: 45V max.
- DSMX™ / DSM2™ compatible, 7-channel full-range telemetry stabilizer with full telemetry features including a built-in barometer with vario, altimeter, energy meter (Current, Voltage, mAh), and internal temperature sensor
- High sensitivity gyro with proprietary stabilization algorithm ensures responsive airplane control for both electric and gasoline engine application
- BEC1 and BEC2 dual inputs allow high-reliability operation while improving setup for high current drain performance servo
- Built-in Detla, V-tail and Normal Wing mixer
- Supports stabilization with separated channel dual aileron operation
- Stabilization always-on feature
- Real-time variable stabilization gain control on channel 8
- All-channel failsafe
- Firmware health monitoring software stack and ultra-low operational voltage (3.6V) ensure the highest hardware reliability
- Generation 2 SDR stack ensures the fastest channel searching and advanced algorithm for signal recovery with ultra-low-latency experience
- Antenna diversity improves the reliability of the wireless link
- Satellite port for additional signal diversity
- Gyro stabilization activation with either AUX2 or Gear channel
- 3 potentiometers for individual gain tuning
User manual
- See www.lemon-rx.com/manual
Quick Reference Guide
Accessing the Setup Menu on the Radio Screen
This feature is available with the newer vesion of GEN2 telemetry receiver only, which can be identified with the new simplified label design. The setup menu can be accessed on the radio screen with a telemetry receiver bound to a Spekrum™ or Radiomaster TX16s radio within the first 60 seconds after power-on by moving the two sticks to their minimum positions on all four channels.
- Power on the receiver and ensure that telemetry information is displayed. Select a telemetry page that shows "Lemon Rx" telemetry information on the radio. For RadioMaster TX16s, see YouTube video "https://www.youtube.com/watch?v=aOL_Iddin1k")
- Ensure that the first four channels can reach very close to +/- 100% (sometimes, with fine-tuning, this can be an issue).
- Within the first 60 seconds after the receiver is powered on, move both the left and right sticks to the lower right and lower left positions.
- Observe the radio telemetry screen and wait for "Lm Rx Config" to appear, which takes about 2 seconds. Release the sticks at this point.
- Use the left/right stick to change the menu. Use the up/down stick to make selections or changes.
*Users can take as much time as needed to change or review settings at this point. Note that changes are only saved if "Exit & Save" is selected at the end of the operation.
Reset stabilizer
- Connect power
- Hold F and B buttons (approximately 5 secs+) until all LED flashes randomly
- Press the C button. Multiple LEDs flash a few times to complete the operation
Bind with bind plug
- Insert bind plug on Channel 7
- Connect power
Bind without bind plug
- Connect power
- Hold the B button until the red LED flashes
Bind with a satellite without a bind plug
- Connect power
- Hold the B button until the red LED flashes
- Disconnect power
- Plug the satellite wire connector into the stabilizer
- Connect power
Failsafe
- Connect power to the receiver and ensure the servos are working with the transmitter
- Press the F button for 3 seconds until green changes from off to on and vice versa to change the failsafe setting. Channel value is saved as failsafe default at the time the green LED turns on.
- Turn off the transmitter and wait 2 seconds to ensure the failsafe is activated accordingly by ensuring there is torque generated with finger-pushing the servo linkage if it was to be set. Vice versa.
Stabilization activation switch
- Disconnect power
- Unplug all servos connection except BEC/ESC
- Insert bind plug to channel 5
- Hold the C button
- Connect power. Wait for about 1 second until the 6 LEDs flash.
- Release the C button
- Press C to make changes within 3 seconds. Green = CH7, Blue = CH5.
- Wait for 3 seconds and remove the bind plug
Wing Mode and Dual Aileron
- Disconnect power
- Unplug all servos connection except BEC/ESC
- Insert bind plug to channel 6
- Hold the C button
- Connect power. Wait for about 1 second until the 6 LEDs flash
- Check the receiver label/user manual to understand the referred LEDs' operation
- Release the C button
- Observe which red LED is flashing and brief press C to select the required mode
- Press C to toggle between settings. On means selected. Exit automatically in 5 seconds.
- Wait for 3 seconds and remove the bind plug
- Ensure transmitter mixing is set accordingly for dual aileron if stabilized dual aileron is to be configured.
Gyro direction
- Check the receiver label/user manual to understand the referred LEDs' operation
- Connect power and wait 1 second
- Hold the C button and wait for about 1 second until the 6 LEDs flash
- Release the C button
- Observe which red LED is flashing and brief press C to select the required mode
- Press C to toggle between settings. On means selected. Exit automatically in 5 seconds.
- Wait for 3 seconds and remove the bind plug.
V/I sensor calibration
- Turn on the receiver and transmitter. The telemetry report page may optionally be checked during and after calibration.
- Plug the V/I sensor. Make sure the required DC loading device such as a brushless motor with ESC as well as the current and voltage meter is connected.
- Press the F and B buttons together at the same time for 2 seconds but no greater than 5 seconds
- Observe 3 green LED flashes. Ensure 8.4V is provided to the V/I sensor.
- Press F or C button briefly
- Observe 3 red LED flashes
- Turn on the DC loading device by throttling the transmitter. Ensure 4A is drawing across the V/I sensor. Be careful with the motor spinning if it is to be used.
- Press the B button to save and exit.
Voltage Probe calibration
- Turn on the receiver and transmitter. The telemetry report page may optionally be checked during and after calibration.
- Plug the voltage probe into the receiver.
- Press the F and B buttons together at the same time for 2 seconds but no greater than 5 seconds
- Observe 3 green LED flashes. Ensure 8.4V is provided to the voltage probe sensor. A fully charged 2S LiPo is very close to 8.4V and may be used.
- Press F or C button briefly
- Observe 3 red LED flashes
- Press the B button to save and exit.
Throttle Lock (TL)
Throttle lock is a feature that is only preferred on electric aircraft and maybe disabled for petrol engine / other application. Factory default will enable this feature.
- Power off the receiver
- Unplug all servos connection except BEC/ESC
- Insert bind plug to Channel 4
- Hold C button (do not release your hand even after power on)
- Power on the receiver (while C button is still being hold)
- Wait (~2sec) and observe until the 6 LEDs are flashing (while C button remains pressed at all time)
- Release the C button when the 6 LEDs are flashing.
- Brief press C to change setting. Three red LEDs means TL disabled or three green LEDs means TL is enabled. User only has 2 seconds to change or receiver will exit TL setting.
Gain setting
- Adjust via the 3 dials or real-time master gain on channel 8 depending on the transmitter channel's availability.
View setting LEDs with all on
- Press the C button briefly (no more than 2 seconds).
|
|
|
|
|
LemonRx DSMP PnP Modul för JR fattning
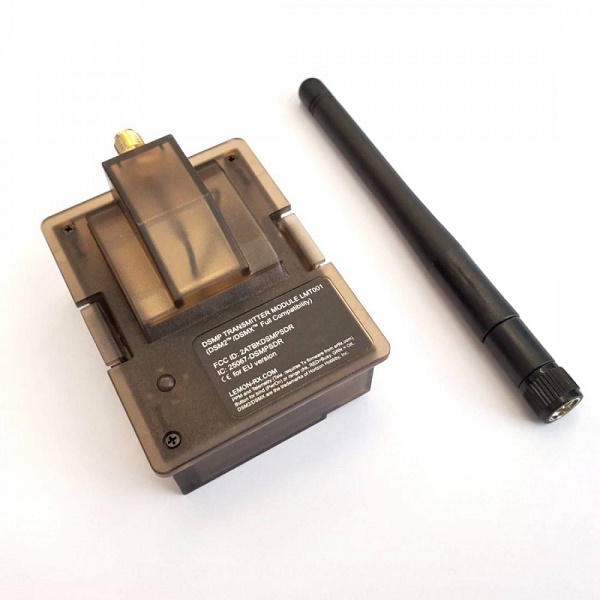
The Lemon Rx DSMP Plug and Go transmitter module is designed specifically for any JR module bay capable transmitter that supports PPM or 9XR-DSM protocol. Example of these transmitters are RadioMaster TX16s, TX12, FrSky Taranis Q X7 and Turnigy 9x just to name a few. The revolutionary DSMP protocol based on software defined radio packet allows full compatibility to all Horizon Hobby's DSMX or DSM2 compatible receiver as well as the bind and ready to fly model aircraft without any channel rescaling configuration required except the first 4 channels' order (TAER or namely Throttle, Aileron, Elevator, Rudder) need to be mapped. The module is designed to work with Lemon Rx or Spektrum-compataible aircraft receiver (not compatible with Spektrum surface receiver).
Telemetry
Telemetry display and alert is supported with ErSky firmware under PPM / 9XR-DSM protocol. ErSky firmware can be dwonloaded at http://www.er9x.com/. For EdgeTX user, the LemonTx module DSMP protocol has been in limited testing in EdgeTX release 2.7 and appears to work correctly. However you are advised to do a proper range check and full channel functionality check before using it for serious model aviation.
RCgroups discussion (Click below link for user manual page with link to RCGroups)
https://lemon-rx.com/manual
Transmitter setup
- Set to use external module with PPM output, 10 channels, 20ms spacing
- Set to use TAER(Throttle, Aileron, Elevator, Rudder) order
- Do not rescale any channels unless necessary. This Plug and Go module has an internal rescaler to ensure proper operation of all Lemon Rx receivers, the popular HH DSMX compatible or DSM2 compatible aircraft
Telemetry display and alert setup (ErSky fimware only)
- Find your radio firmware at http://www.er9x.com/ and update it
-PPM / 9XR-DSM protocol can all be used for receiver operation. Set telemetry packet decoding to accept DSM telemetry packet.
Binding to DSMP, DSMX compatible or DSM2 compatible receiver / planes
- Press and hold the button on the module
- Turn on the transmitter and by pass all the warning messages (if any)
- Wait until the module turns on with red light on and green light flashing
- Release button
- Observe indication. Green light on means binding is completed. Red light flashing indicates bind fails. Turn off the transmitter and resume the whole binding procedure if bind fails.
Range check
During normal operation (green light on), press and hold the button puts the module in range check mode (red light on). Range check mode passes with valid control of the model from 30 meters away. Release the button to allow full power transmission.
Note:
1) This is not a Spektrum DSMX or DSM2 product, nor is it a copy of a Spektrum DSM2 or DSMX product. The Spektrum, DSMX and DSM2 brand is a trademark of Horizon Hobby, Inc.
2) This is not an underground black market fake Spektrum product. Lemon Rx quality is guaranteed.
3) Lemon Rx products are tested to be compatible with Spektrum's DSMX and or DSM2 product (Spketrum, DSMX and DSM2 are the registered trademark of Horizon Hobby, Inc.).
|
|
|
|
|
LemonRx DSMP DIY Legacy Modul för sändare
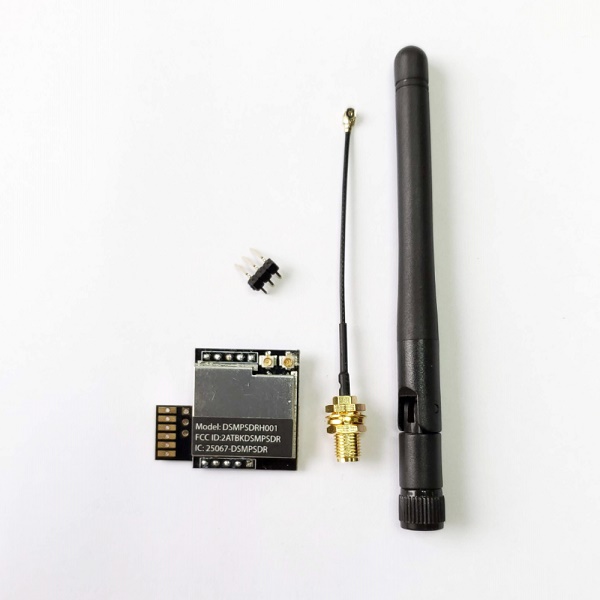
The Lemon Rx DIY module is an electronic kit that addresses the need for RC modeler in legacy transmitter conversion. The module is designed to work with Lemon Rx or Spektrum-compataible aircraft receiver (not compatible with Spektrum surface receiver). The firmware is specifically designed to restore the original PPM waveform on Lemon Rx or Spektrum™ receiver. The module accepts 5V to 12V as supply input while accepting PPM signal from 3V to 12V with auto detection on PPM signal polarity. The module accepts high tolerance of PPM signal found in some legacy transmitter while accepting a minimum of 2 channels and up.
RCgroups discussion (Click below link for user manual page with link to RCGroups)
https://lemon-rx.com/manual
Caution before installation
- Avoid static electric by grounding yourself to metallic surface. Metallic surface working table is recommended (such as on top of a laundry).
- Do not interrupt power provided to the module initially. Doing so may damage the RF front-end. Make sure power wiring harness is connected securely before providing power to the module.
- Install SMT connector to SMA conversion cable to the module as well as antenna prior to power on. Power on without antenna may possibly damages the device.
Antenna connection and Wiring implementation 1
The SMT U.FL connector closest to the center of module should only be used for RF transmission. The optional 3 header pins can be optionally soldered for Ground, V+ and PPM signal in. All these connections are needed for full operation with the on board button for binding and range check. See below diagram.

Wiring implementation 2
Below diagram uses the module pads for direct soldering to suit installation needs. The 3 header pins on implementation 1 can be ignored by using these connections. External bind push button soldering pad can be found here.

Bind procedure and implementation
Bind button on board can be used or externally wired with 2 pads labeled "PB".
- Turn on the transmitter and by pass all the warning messages (if any)
- Wait until the module turns on with red light on and green light flashing
- Release button
- Observe indication. Green light on means binding is completed. Red light flashing indicates bind fails. Turn off the transmitter and resume the whole binding procedure if bind fails.
Range check
During normal operation (green light on), press and hold the button puts the module in range check mode (red light on). Range check mode passes with valid control of the model from 30 meters away. Release the button to allow full power transmission.
Telemetry support with ErSky / EdgeTX firmware for non-vintage radio (See LMT0001 as a better alternative)
Although unlikely to be used, LMT0002 comes with telemetry serial UART output when a telemetry capable receiver is used. Telemetry display and alert is supported with ErSky firmware under PPM / 9XR-DSM protocol. ErSky firmware can be dwonloaded at http://www.er9x.com/. For EdgeTX user, the LemonTx module DSMP protocol has been in limited testing in EdgeTX release 2.7 and appears to work correctly. However you are advised to do a proper range check and full channel functionality check before using it for serious model aviation.
Note:
1) This is not a Spektrum DSMX or DSM2 product, nor is it a copy of a Spektrum DSM2 or DSMX product. The Spektrum, DSMX and DSM2 brand is a trademark of Horizon Hobby, Inc.
2) This is not an underground black market fake Spektrum product. Lemon Rx quality is guaranteed.
3) Lemon Rx products are tested to be compatible with Spektrum's DSMX and or DSM2 product (Spketrum, DSMX and DSM2 are the registered trademark of Horizon Hobby, Inc.).
|
|
|
|
|
LemonRx DSMP 10-Kan Stabilizer/Volt sens. DSMX/DSM2
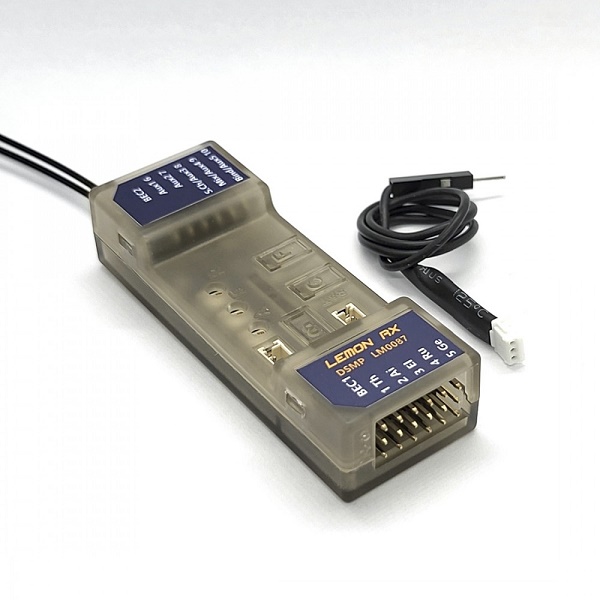
Spektrumkompatibel mottagare.
Product Specifications:
Weight and Dimension: 16.3 grams, 66mm x 15mm x 24mm
Recommended voltage range: 3.9V to 8.5V (2S LiPo capable)
Telemetry Option: Integrated with Barometer with Vario, Altimeter, Energy meter (Requires V/I sensor) and Internal Temperature Sensor
Technology: DSMP with GEN2 SDR stack (DSMX / DSM2 compatibility)
Fungerar även med Spektrum NX serien.
Highlight
The generation 2 DSMP 10-channel telemetry stabilizer is a complete redesign that provides the ultimate reliability, features and performance.
- Choices of voltage and current sensors with exceptional capability
- XT60 / T-Plug: 5S LiPo (21V max), 60A max.
- Voltage Probe: 45V max.
- DSMX / DSM2 compatible, 10-channel full-range telemetry stabilizer with full telemetry features including a built-in barometer with vario, altimeter, energy meter (Current, Voltage, mAh), and internal temperature sensor
- High sensitivity gyro with proprietary stabilization algorithm ensures responsive airplane control for both electric and gasoline engine application
- BEC1 and BEC2 dual inputs allow high-reliability operation while improving setup for high current drain performance servo
- Built-in Detla, V-tail and Normal Wing mixer
- Supports stabilization with separated channel dual aileron operation
- Stabilization always-on feature allows nine usable channels on a 10-channel receiver
- Real-time variable stabilization gain control on channel 8
- All-channel failsafe
- Firmware health monitoring software stack and ultra-low operational voltage (3.6V) ensures high operation reliability
- Generation 2 SDR stack ensures the fastest channel searching and advanced algorithm for signal recovery with ultra-low-latency experience
- Antenna diversity improves the reliability of the wireless link
- Satellite port for additional signal diversity
- Gyro stabilization activation with either AUX2 or Gear channel
- 3 potentiometers for individual gain tuning
User manual
- See www.lemon-rx.com/manual
Quick Reference Guide
Reset stabilizer
- Connect power
- Hold F and B buttons (approximately 5 secs+) until all LED flashes randomly
- Press the C button. Multiple LEDs flash a few times to complete the operation
Bind with bind plug
- Insert bind plug on Channel 10
- Connect power
Bind without bind plug
- Connect power
- Hold the B button until the red LED flashes
Bind with a satellite without a bind plug
- Connect power
- Hold the B button until the red LED flashes
- Disconnect power
- Plug the satellite wire connector into the stabilizer
- Connect power
Failsafe
- Connect power to the receiver and ensure the servos are working with the transmitter
- Press the F button for 3 seconds until green changes from off to on and vice versa to change the failsafe setting. Channel value is saved as failsafe default at the time the green LED turns on.
- Turn off the transmitter and wait 2 seconds to ensure the failsafe is activated accordingly by ensuring there is torque generated with finger-pushing the servo linkage if it was to be set. Vice versa.
Stabilization activation switch
- Disconnect power
- Insert bind plug to channel 8
- Hold the C button
- Connect power. Wait for about 1 second until the 6 LEDs flash.
- Release the C button
- Press C to make changes within 3 seconds. Green = CH7, Blue = CH5.
- Wait for 3 seconds and remove the bind plug
Wing Mode and Dual Aileron
- Disconnect power
- Insert bind plug to channel 9
- Hold the C button
- Connect power. Wait for about 1 second until the 6 LEDs flash
- Check the receiver label/user manual to understand the referred LEDs' operation
- Release the C button
- Observe which red LED is flashing and brief press C to select the required mode
- Press C to toggle between settings. On means selected. Exit automatically in 5 seconds.
- Wait for 3 seconds and remove the bind plug
- Ensure transmitter mixing is set accordingly for dual aileron if stabilized dual aileron is to be configured.
Gyro direction
- Check the receiver label/user manual to understand the referred LEDs' operation
- Connect power and wait 1 second
- Hold the C button and wait for about 1 second until the 6 LEDs flash
- Release the C button
- Observe which red LED is flashing and brief press C to select the required mode
- Press C to toggle between settings. On means selected. Exit automatically in 5 seconds.
- Wait for 3 seconds and remove the bind plug.
V/I sensor calibration
- Turn on the receiver and transmitter. The telemetry report page may optionally be checked during and after calibration.
- Plug the V/I sensor. Make sure the required DC loading device such as a brushless motor with ESC as well as the current and voltage meter is connected.
- Press the F and B buttons together at the same time for 2 seconds but no greater than 5 seconds
- Observe 3 green LED flashes. Ensure 8.4V is provided to the V/I sensor.
- Press F or C button briefly
- Observe 3 red LED flashes
- Turn on the DC loading device by throttling the transmitter. Ensure 4A is drawing across the V/I sensor. Be careful with the motor spinning if it is to be used.
- Press the B button to save and exit.
V/I probe calibration
- Turn on the receiver and transmitter. The telemetry report page may optionally be checked during and after calibration.
- Plug the V/I sensor. Make sure the required DC loading device such as a brushless motor with ESC as well as the current and voltage meter is connected.
- Press the F and B buttons together at the same time for 2 seconds but no greater than 5 seconds
- Observe 3 green LED flashes. Ensure 8.4V is provided to the V/I sensor.
- Press F or C button briefly
- Observe 3 red LED flashes
- Press the B button to save and exit.
Gain setting
- Adjust via the 3 dials or real-time master gain on channel 8 depending on the transmitter channel's availability.
View setting LEDs with all on
- Press the C button briefly (no more than 2 seconds).
|
|
|
|
|
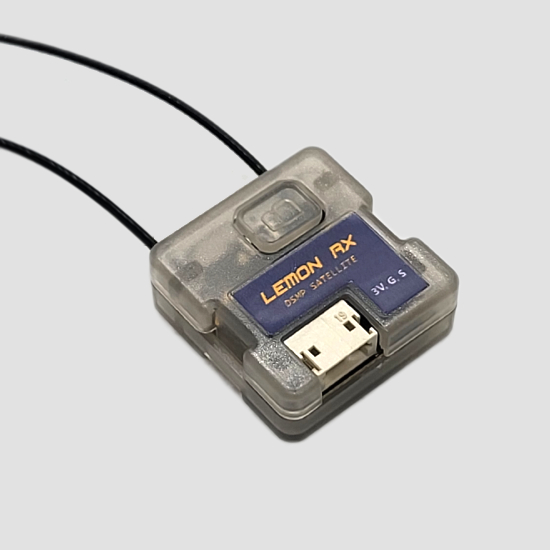
LemonRx DSMP Satellitmottagare Diversity DSMX/DSM2 GEN2
Spektrumkompatibel mottagare.
Lemon Rx GEN2 DSMP satellite receiver is DSMX/DSM2 compatible that provides superior performance with antenna diversity. Bind button allows binding to the transmitter without having a receiver. The satellite comes with 25cm JST connector wire (not shown in photo) for the convenience of connecting it to a Lemon Rx GEN2, Flight Controller or Spektrum receiver.
- Dimension: 23mm x 22.5mm x 9mm
- 4.1 grams (with casing)
- 2.7V to 3.5V voltage input
- Bind button allows binding without a receiver nor require special initialization sequence such as using flight controller
- Generation 2 SDR stack ensures the fastest channel searching and advanced algorithm for signal recovery with ultra-low-latency experience
- Best suited to application that requires excpetional signal performance under signal fading condition such as drone
- Antenna diversity improves the reliability of the wireless link
Quick Reference Guide:
Binding with receiver
- Connect the DSMP satellite to DSMP receiver
- Prepare the receiver in bind mode with satellite connected
- Power cycle the receiver will cause both receiver and satellite in bind mode with LED flashes.
Binding without receiver
- Connect the DSMP satellite to an appropriate device such as Flight Controller and make sure there is power provided to the satellite
- Hold the B button on the satellite for about 3 seconds. The LED flashes indicate satellite is ready to bind to a transmitter without a receiver connected.
Flight Controller
- Choose DSMX 2048 on the flight controller for protocol
- Do not use SRXL2 interface. LM0037A acts as a receiving device only for flight controller and does not have telelemtry feature.
|
|
|
|
|
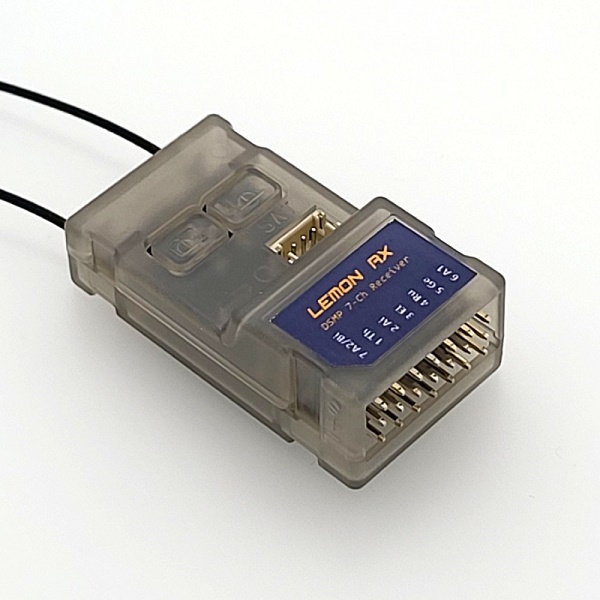
LemonRx DSMP 7-kan. Mottagare Diversity GEN2
Spektrumkompatibel mottagare.
Product Specification
Dimension and Weight: 42.0mm(L) x 23.1mm(W), 9.5g
Recommended voltage range: 3.5V to 8.5V (2S LiPo capable)
Technology: DSMP with GEN2 SDR stack (DSMX / DSM2 compatibility)
DSMP 7-channel receiver is DSMX/DSM2 compatible that provides superior performance with diversity antenna.
Fungerar även med Spektrum NX serien.
Quick Reference Guide:
Failsafe:
Failsafe will be activated when the receiver has lost signal for more than 2 seconds. Failsafe can only get set when the unit has just been powered on within 60 seconds.
Activate all-channel failsafe:
- Power on the unit that is already bind to a transmitter with transmitter on
- Ensure green LED is off (failsafe is disabled prior to activation)
- Set the channel position required and stay still
- Press and hold the F button for 3 seconds until green LED is on.
Deactivate all-channel failsafe:
- Power on the unit
- Press and hold the F button for 3 seconds until green LED is off.
1S LiPo Application
The minimum recommended safe supply voltage is 3.5V
NOTE:
The battery must be capable of maintaining that voltage while delivering the required maximum load current to the receiver and servos.
In some cases you MAY be able to operate at a lower voltage (for example a well discharged 1S LiPo cell) but you must test it in practice to be sure.
|
|
|
|
|
LemonRx DSMP 6 kan. Mottagare DSMX/DSM2 GEN2
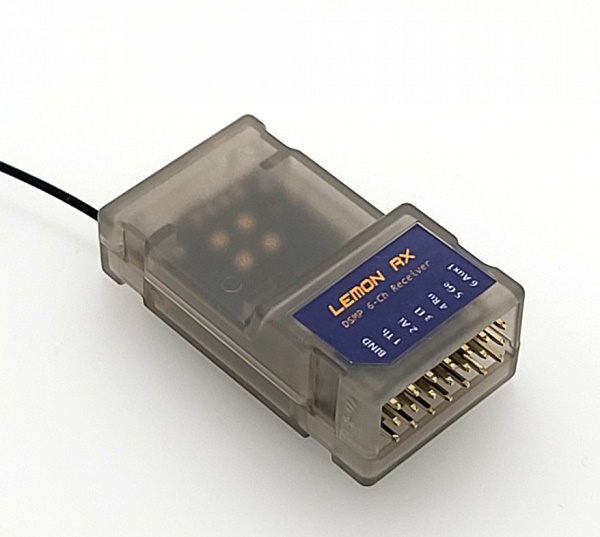
Se manual under fliken "Dokument" för mer info.
Spektrumkompatibel mottagare.
Product Specification:
Dimension and Weight: 42.0 (L) x 23.1 mm(W), 8.7 g.
Recommended voltage range: 3.5V to 8.5V (2S LiPo capable)
Technology: DSMP with GEN2 SDR stack (DSMX / DSM2 compatibility)
DSMP 6-channel receiver is DSMX/DSM2 compatible that provides exceptional performance.
Fungerar även med Spektrum NX serien.
Quick Reference Guide:
Failsafe:
Bind receiver and current channel values will be saved. Failsafe will be activated when no signal is received for 2 seconds. All channels will be positioned to failsafe default. For this reason, it is recommended that the throttle should be at 0% while all other sticks are centred during binding.
1S LiPo Application:
The minimum recommended safe supply voltage is 3.5V
NOTE:
The battery must be capable of maintaining that voltage while delivering the required maximum load current to the receiver and servos.
In some cases you MAY be able to operate at a lower voltage (for example a well discharged 1S LiPo cell) but you must test it in practice to be sure.
|
|
|
|
|
LemonRx DSMP/X 7-kan Stabilizer/Volt sens. DSMX/DSM2 GEN2
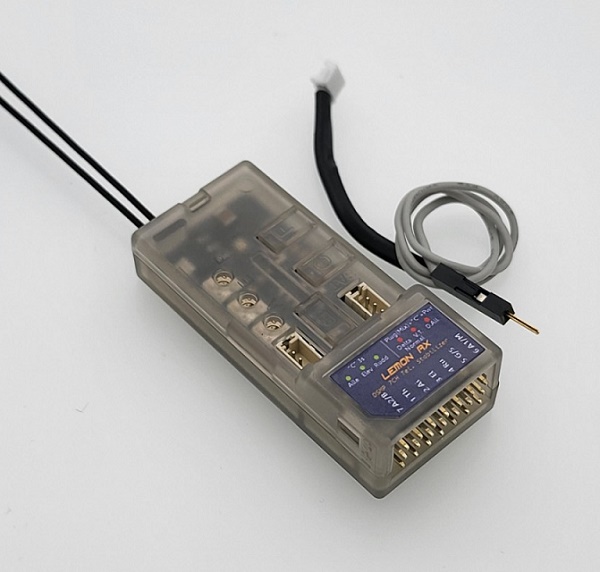
Spektrumkompatibel mottagare.
Data:
Kompatibelt system: DSMP with GEN2 SDR stack (DSMX / DSM2 compatability)(Spektrum 2.4 GHz).
Antal kanaler: 6 st.
Vikt: 14 gram.
Storlek: 55 x15 x 23 mm.
Drivspänning: 3,9 - 8.5 V.
Räckvidd: Full
Telemetri: Integrated with Barometer, Altimeter, Energy meter (Require V/I sensor) and Internal Temperature Sensor.
Fungerar även med Spektrum NX serien.
The generation 2 DSMP 7-channel telemetry stabilizer is a complete redesign that provides the ultimate reliability, features and performance.
- DSMX / DSM2 compatible, 7-channel full-range telemetry stabilizer with full telemetry features including a built-in barometer, altimeter, energy meter (Current, Voltage, mAh), and internal temperature sensor
- High sensitivity gyro with proprietary stabilization algorithm ensures responsive airplane control for both electric and gasoline engine application
- BEC1 and BEC2 dual inputs allow high-reliability operation while improving setup for high current drain performance servo
- Built-in Detla, V-tail and Normal Wing mixer
- Supports stabilization with separated channel dual aileron operation
- Stabilization always-on feature
- Real-time variable stabilization gain control on channel 8
- All-channel failsafe
- Firmware health monitoring software stack and ultra-low operational voltage (3.6V) ensure the highest hardware reliability
- Generation 2 SDR stack ensures the fastest channel searching and advanced algorithm for signal recovery with ultra-low-latency experience
- Antenna diversity improves the reliability of the wireless link
- Satellite port for additional signal diversity
- Gyro stabilization activation with either AUX2 or Gear channel
- 3 potentiometers for individual gain tuning
|
|
|
|
|
|
|
LemonRx Antenna 20 cm For Diversity Rx/Telemetry Sys.
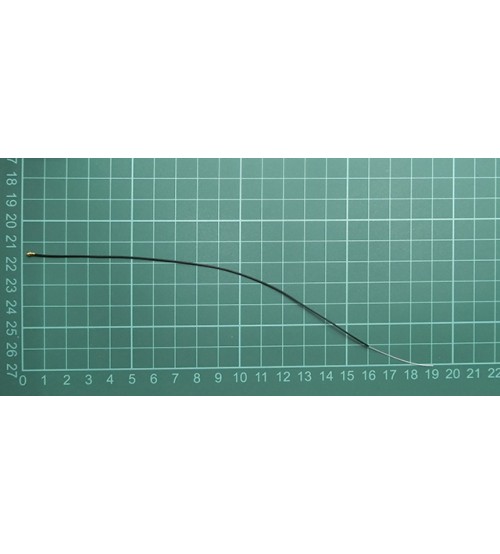
Replacement antenna for diveristy receiver / telemetry system
- Careful workmanship and inspection to ensure this IPX-3 connector with antenna peforms exceptionally well in transceiving 2.45GHz signal
-20 cm in length
|
|
|
|
|
LemonRx Ersättingssensor Deans (till telemetri)
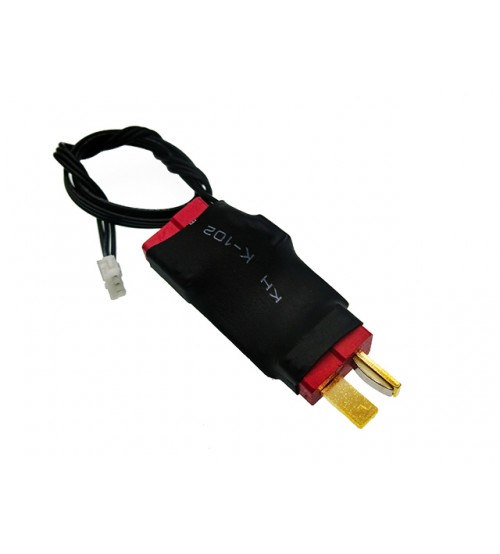
Lemon Rx Replacement Sensor:
60 Ampere, T-Plug Energy Meter Sensor For Telemetry System.
Telemetry system must be re-calibrated for proper function.
See telemetry system product page for downloadable user manual.
|
|
|
|
|
LRx DSMP/X 7-kan Telemetri,Vario,höjd mm EC5 REA!
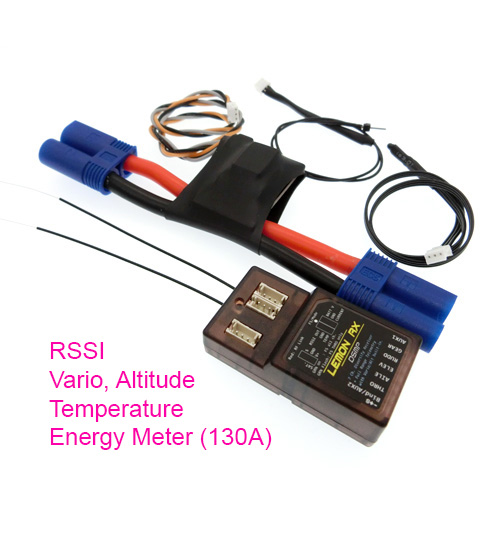
Spektrumkompatibel mottagare.
OBS! Passar ännu inte de nya Spektrumsändarna i NX serien.
After almost 2 years of on going development since 2016, we have put variometer, energy meter (mAh, V, Curent) and just about every major telemetry parameter in one tiny package. LM0052 is the world smallest, true full-range telemetry system with build-in sensors along with diveristy receiver shrinked in the smallest possible package.
Highlight
- Very high accuracy barometer built-in to the receiver to provide altitude and vario information
- True Full-range diversity telemetry provides plane information in real-time as far as you can fly your plane with any DSMX or DSM2 compatible transmitter
- Energy metering system (mAh, V, Current) are included with the provided V/I sensing unit
- 2-stage failsafe best suited for gasoline / electric application (Selectable failsafe for pre-defined position as throttle only or all channel failafe in the event of signal absence)
- Diveristy extended antenna receiver with state-of-the-art RF circuit providing umatched performance of reception
- Real time RSSI output as analog voltage / displayed on transmitter A parameter
- Glider may use the inlcuded wiring for battery voltage sensing only if energy metering system is not required for absolute weight reduction
- Optional diversity satellite maybe used to provide total of 4 receiving antennas
LM0052 telemetry range comparsion with Spektrum and Orange
The outstanding telemetry range of LM0052 are tested with Spektrum and Orange telemetry capable receiver as a basic performance benchmark. Please note that for fairness of this testing as the other receiver may not contain diveristy antenna unlike the LM0052, the setup is performed such that diveristy will have no advantage of any range improvement during this test.
- For (*1) V/I sensor may be required to purchase seperately on LM0051U, LM0052U and LM0041 if mAh consumed / current measurment is required
RCgroups discussion
LM0052 discussion in Lemon Rx Telemetry thread.
http://www.rcgroups.com/forums/showthread.php?t=2266873
User Manual re-direct link (Thanks to John [JJ604 RCgroups] and Nigel in helping us with this user manual.)
Direct link for LM0051 / LM0052 / LM0041: https://www.rcgroups.com/forums/showpost.php?p=29478803&postcount=6
General user manual link for all products: http://www.lemon-rx.com/index.php?route=information/information&information_id=7
Quick start-up guide / tips
V/I sensor calibration
- V/I sensor would normally not need calibration with the LM0052 bundled unit
- V/I sensor can be calibrated following section F of LM0041 user manual
Step for setting failsafe
Fail-safe activates when the receiver no longer receivers signal (Eg. Transmitter is off / signal loss). There are 3 possible setting which are:
- No signal output to servo
- Output predefined throttle signal only
- Output predefined signal for all channels
1) Insert bind plug
2) Provide power to the unit and bind the unit but do not remove bind plug
3) Set your transmitter to the perferred position as failsafe default output and hold it to this position.
3) press the button briefly will cause the green light to be in the following status. Press the button while maintain your perferred position of the channel:
- Green LED status - none: No pulse to servo with the absence of correct reception
- Green LED status - flashing: Throttle-only preset. Throttle position had been acquired as failsafe default output
- Green LED status - solid: All-channel preset. All channels' position had been acquired as failsafe default ouptut
4) Remove bind plug
5) Turn off the transmitter now while power is still provided to receiver. You can now observe the failsafe status when no transmitter signal is present to the receiver. Please becareful that your propeller may turns if you set throttle channel above 0% in the event of signal losses. Failsafe can be useful as a last rsource to save plane for unexpected situation when the receiver is no longer receiving signal from transmitter such as interference problem.
Specification
Type: Lemon Rx DSMP (DSMX compatible) 7-Channel Full-Range Telemetry with diversity receiver (Vario + Energy Meter + Altitude)
Number of Channel: 7
Modulation: DSMP (DSMX and DSM2 compatible)
Band: 2.4 GHz
Dimension: 44(L) x 24(W) x 15(H) mm
Weight: 9.56g
Voltage Range: 4.5 - 8.5V
Note:
1) This is not a Spektrum DSMX or DSM2 product, nor is it a copy of a Spektrum DSM2 or DSMX product. The Spektrum, TM1000, AR9020, DSMX and DSM2 brand is a trademark of Horizon Hobby, Inc.
2) This is not an underground black market fake Spektrum product. Lemon Rx quality is guaranteed.
3) Lemon Rx products are tested to be compatible with Spektrum's DSMX and or DSM2 product (Spketrum, DSMX and DSM2 are the registered trademark of Horizon Hobby, Inc.).
4) The Hobby King, R1020X V2 brand are the trademark of Hextronik Limited.
|
|
|
|
|
|
|
LRx DSMP/X 7-kan Telemetri,Vario,höjd mm XT60 REA!
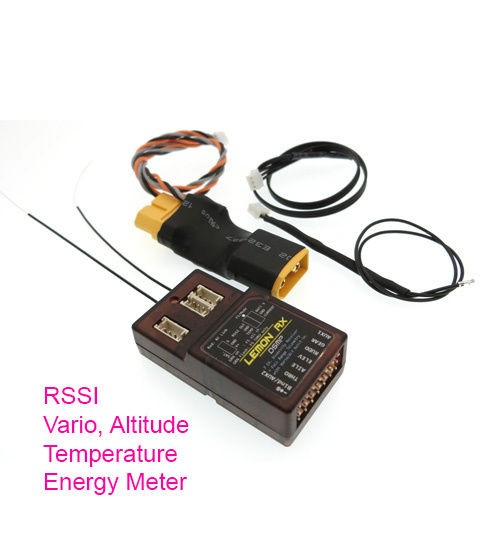
Spektrumkompatibel mottagare.
OBS! Passar ännu inte de nya Spektrumsändarna i NX serien.
After almost 2 years of on going development since 2016, we have put variometer, energy meter (mAh, V, Curent) and just about every major telemetry parameter in one tiny package. LM0052 is the world smallest, true full-range telemetry system with build-in sensors along with diveristy receiver shrinked in the smallest possible package.
Highlight
- Very high accuracy barometer built-in to the receiver to provide altitude and vario information
- True Full-range diversity telemetry provides plane information in real-time as far as you can fly your plane with any DSMX or DSM2 compatible transmitter
- Energy metering system (mAh, V, Current) are included with the provided V/I sensing unit
- 2-stage failsafe best suited for gasoline / electric application (Selectable failsafe for pre-defined position as throttle only or all channel failafe in the event of signal absence)
- Diveristy extended antenna receiver with state-of-the-art RF circuit providing umatched performance of reception
- Real time RSSI output as analog voltage / displayed on transmitter A parameter
- Glider may use the inlcuded wiring for battery voltage sensing only if energy metering system is not required for absolute weight reduction
- Optional diversity satellite maybe used to provide total of 4 receiving antennas
LM0052 telemetry range comparsion with Spektrum and Orange
The outstanding telemetry range of LM0052 are tested with Spektrum and Orange telemetry capable receiver as a basic performance benchmark. Please note that for fairness of this testing as the other receiver may not contain diveristy antenna unlike the LM0052, the setup is performed such that diveristy will have no advantage of any range improvement during this test.
Telemetry reporting
Below listed telemetry reporting are available with the purchased package. No additional purchase is required.
- Included sensors / interface: Alltitude, Vario, Energy meter (Receiver voltage, Battery voltage, mAh consumed, Current), Temeprature (Internal automatically selected when the inlcuded external temperature probe is not used), RSSI out (3V to 0V) and displayed on transmitter A parameter
Telemetry receivers' feature
Comparision of Lemon Rx full-range telemetry capable diversity receiver.
- LM0051U and LM0052U will soon be available for purchase
- For (*1) V/I sensor may be required to purchase seperately on LM0051U, LM0052U and LM0041 if mAh consumed / current measurment is required
- Please note the input voltage at V/I sensor is 7.8V to 22V( or 2S to 5S LiPo). Using voltage probe without V/I sensor will accept up to 35V of input voltage at voltage probe pin. Re-calibration maybe required switching between voltage probe or V/I sensor and vice versa. V/I sensor maybe an optional item depending on the package selected.
RCgroups discussion
LM0052 discussion in Lemon Rx Telemetry thread.
http://www.rcgroups.com/forums/showthread.php?t=2266873
User Manual re-direct link (Thanks to John [JJ604 RCgroups] and Nigel in helping us with this user manual.)
Direct link for LM0051 / LM0052 / LM0041: https://www.rcgroups.com/forums/showpost.php?p=29478803&postcount=6
General user manual link for all products: http://www.lemon-rx.com/index.php?route=information/information&information_id=7
Quick start-up guide / tips
V/I sensor calibration
- V/I sensor would normally not need calibration with the LM0052 bundled unit
- V/I sensor can be calibrated following section F of LM0041 user manual
Step for setting failsafe
Fail-safe activates when the receiver no longer receivers signal (Eg. Transmitter is off / signal loss). There are 3 possible setting which are:
- No signal output to servo
- Output predefined throttle signal only
- Output predefined signal for all channels
1) Insert bind plug
2) Provide power to the unit and bind the unit but do not remove bind plug
3) Set your transmitter to the perferred position as failsafe default output and hold it to this position.
3) press the button briefly will cause the green light to be in the following status. Press the button while maintain your perferred position of the channel:
- Green LED status - none: No pulse to servo with the absence of correct reception
- Green LED status - flashing: Throttle-only preset. Throttle position had been acquired as failsafe default output
- Green LED status - solid: All-channel preset. All channels' position had been acquired as failsafe default ouptut
4) Remove bind plug
5) Turn off the transmitter now while power is still provided to receiver. You can now observe the failsafe status when no transmitter signal is present to the receiver. Please becareful that your propeller may turns if you set throttle channel above 0% in the event of signal losses. Failsafe can be useful as a last rsource to save plane for unexpected situation when the receiver is no longer receiving signal from transmitter such as interference problem.
Specification
| Type: |
Lemon Rx DSMP (DSMX compatible) 7-Channel Full-Range Telemetry with diversity receiver (Vario + Energy Meter + Altitude) |
| Number of Channel: |
7 |
| Modulation: |
DSMP (DSMX and DSM2 compatible) |
| Band: |
2.4 GHz |
| Dimension: |
44(L) x 24(W) x 15(H) mm |
| Weight: |
9.56g |
| Voltage Range: |
4.5 - 8.5V |
Note:
1) This is not a Spektrum DSMX or DSM2 product, nor is it a copy of a Spektrum DSM2 or DSMX product. The Spektrum, TM1000, AR9020, DSMX and DSM2 brand is a trademark of Horizon Hobby, Inc.
2) This is not an underground black market fake Spektrum product. Lemon Rx quality is guaranteed.
3) Lemon Rx products are tested to be compatible with Spektrum's DSMX and or DSM2 product (Spketrum, DSMX and DSM2 are the registered trademark of Horizon Hobby, Inc.).
4) The Hobby King, R1020X V2 brand are the trademark of Hextronik Limited.
|
|
|
|
|
LRx DSMP/X 7-kan Telemetri,Vario,höjd mm Deans REA!
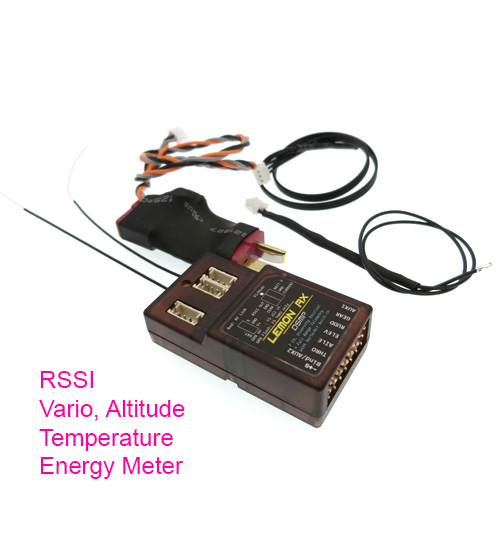
Spektrumkompatibel mottagare.
OBS! Passar ännu inte de nya Spektrumsändarna i NX serien.
After almost 2 years of on going development since 2016, we have put variometer, energy meter (mAh, V, Curent) and just about every major telemetry parameter in one tiny package.
LM0052 is the world smallest, true full-range telemetry system with build-in sensors along with diveristy receiver shrinked in the smallest possible package.
Specification:
Type: Lemon Rx DSMP (DSMX compatible) 7-Channel Full-Range Telemetry with diversity receiver (Vario + Energy Meter + Altitude)
Number of Channel: 7
Modulation: DSMP (DSMX and DSM2 compatible)
Band: 2.4 GHz
Dimension: 44(L) x 24(W) x 15(H) mm
Weight: 9.56g
Voltage Range: 4.5 - 8.5V
Highlight
- Very high accuracy barometer built-in to the receiver to provide altitude and vario information
- True Full-range diversity telemetry provides plane information in real-time as far as you can fly your plane with any DSMX or DSM2 compatible transmitter
- Energy metering system (mAh, V, Current) are included with the provided V/I sensing unit
- 2-stage failsafe best suited for gasoline / electric application (Selectable failsafe for pre-defined position as throttle only or all channel failafe in the event of signal absence)
- Diveristy extended antenna receiver with state-of-the-art RF circuit providing umatched performance of reception
- Real time RSSI output as analog voltage / displayed on transmitter A parameter
- Glider may use the inlcuded wiring for battery voltage sensing only if energy metering system is not required for absolute weight reduction
- Optional diversity satellite maybe used to provide total of 4 receiving antennas
LM0052 telemetry range comparsion with Spektrum and Orange
The outstanding telemetry range of LM0052 are tested with Spektrum and Orange telemetry capable receiver as a basic performance benchmark. Please note that for fairness of this testing as the other receiver may not contain diveristy antenna unlike the LM0052, the setup is performed such that diveristy will have no advantage of any range improvement during this test.
Telemetry reporting
Below listed telemetry reporting are available with the purchased package. No additional purchase is required.
- Included sensors / interface: Alltitude, Vario, Energy meter (Receiver voltage, Battery voltage, mAh consumed, Current), Temeprature (Internal automatically selected when the inlcuded external temperature probe is not used), RSSI out (3V to 0V) and displayed on transmitter A parameter
RCgroups discussion
LM0052 discussion in Lemon Rx Telemetry thread.
http://www.rcgroups.com/forums/showthread.php?t=2266873
User Manual re-direct link (Thanks to John [JJ604 RCgroups] and Nigel in helping us with this user manual.)
To be announced.
http://www.lemon-rx.com/index.php?route=information/information&information_id=7
Quick start-up guide / tips
V/I sensor calibration
- V/I sensor would normally not need calibration with the LM0052 bundled unit
- V/I sensor can be calibrated following section F of LM0041 user manual
Step for setting failsafe
Fail-safe activates when the receiver no longer receivers signal (Eg. Transmitter is off / signal loss). There are 3 possible setting which are:
- No signal output to servo
- Output predefined throttle signal only
- Output predefined signal for all channels
1) Insert bind plug
2) Provide power to the unit and bind the unit but do not remove bind plug
3) Set your transmitter to the perferred position as failsafe default output and hold it to this position.
3) press the button briefly will cause the green light to be in the following status. Press the button while maintain your perferred position of the channel:
- Green LED status - none: No pulse to servo with the absence of correct reception
- Green LED status - flashing: Throttle-only preset. Throttle position had been acquired as failsafe default output
- Green LED status - solid: All-channel preset. All channels' position had been acquired as failsafe default ouptut
4) Remove bind plug
5) Turn off the transmitter now while power is still provided to receiver. You can now observe the failsafe status when no transmitter signal is present to the receiver. Please becareful that your propeller may turns if you set throttle channel above 0% in the event of signal losses. Failsafe can be useful as a last rsource to save plane for unexpected situation when the receiver is no longer receiving signal from transmitter such as interference problem.
Note:
1) This is not a Spektrum DSMX or DSM2 product, nor is it a copy of a Spektrum DSM2 or DSMX product. The Spektrum, TM1000, AR9020, DSMX and DSM2 brand is a trademark of Horizon Hobby, Inc.
2) This is not an underground black market fake Spektrum product. Lemon Rx quality is guaranteed.
3) Lemon Rx products are tested to be compatible with Spektrum's DSMX and or DSM2 product (Spketrum, DSMX and DSM2 are the registered trademark of Horizon Hobby, Inc.).
4) The Hobby King, R1020X V2 brand are the trademark of Hextronik Limited.
|
|
|
|
|
|